
Rename package in Android Studio
Rename package in Android Studio
Learn how to rename a package in Android Studio with this step-by-step guide, perfect for updating your project structure and improving organization.
In Android Studio, you can do this:
For example, if you want to change com.example.app to my.awesome.game, then:
1. In your Project panel, click on the little gear icon ⚙️
2. Uncheck the Compact Empty Middle Packages option

3. Your package directory will now be broken down into individual directories
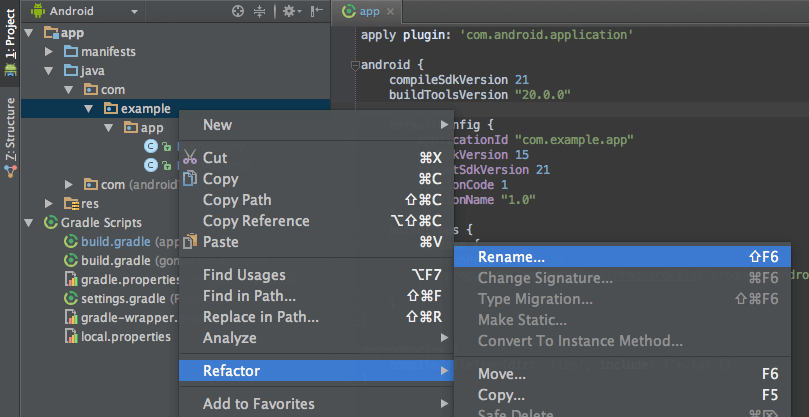
4. Individually select each directory you want to rename, and:
Right-click on it
Select
RefactorClick on
RenameIn the pop-up dialog, click on
Rename Packageinstead of Rename DirectoryEnter the new name and hit Refactor
Click Do Refactor in the bottom
Allow a minute to let Android Studio update all changes
Note: When renaming
comin Android Studio, it might give a warning. In such case, select Rename All
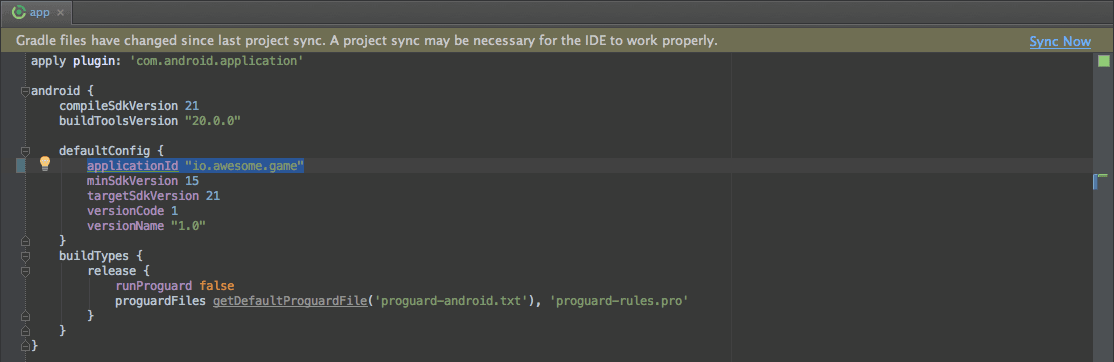
5. Now open your Gradle Build File (build.gradle - Usually app or mobile). Update the applicationId in the defaultConfig to your new Package Name and Sync Gradle, if it hasn't already been updated automatically:
6. You may need to change the package= attribute in your manifest.
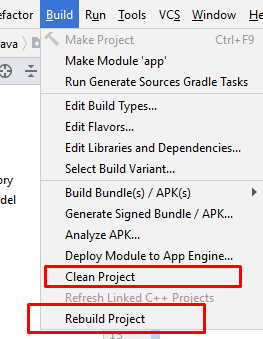
7. Clean and Rebuild.
8. Done! Anyway, Android Studio needs to make this process a little simpler.
Conclusion
Renaming a package in Android Studio is a straightforward process, but it does require attention to detail.
By following these simple steps, you can successfully change your package name without breaking your project. Always remember to update the Gradle build file and manifest to reflect the new package name, and don't forget to clean and rebuild your project to ensure everything runs smoothly.
Although this process could be more streamlined, Android Studio does provide the necessary tools to make package renaming manageable. With this guide, you’ll be able to maintain a clean and well-organized project structure, improving both your workflow and project scalability.
Happy coding!